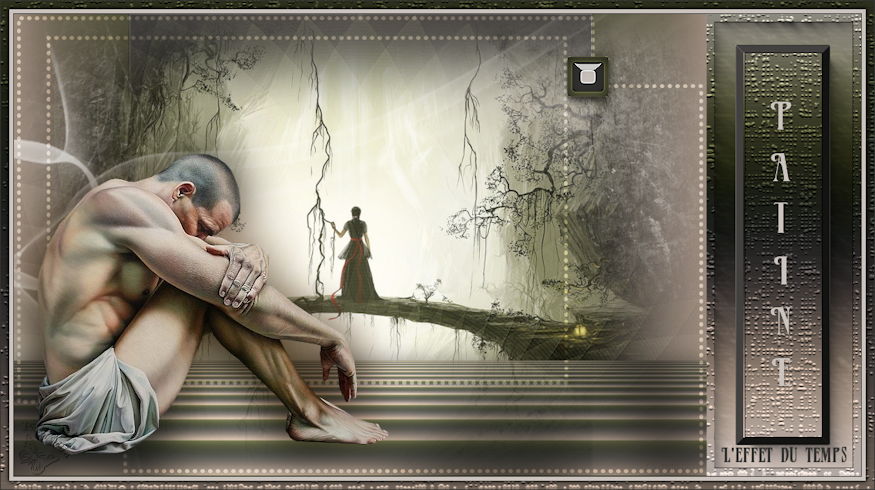
Patine, l éffet du temps (2)
This tutorial was
made by me with PSP2020
You can find the original tutorial
here
Supplies here
Plugins
Filters Unlimited - VM Toolbox / Bkg Kaleidoscope / Graphics Plus
Medhi
Mura's Meister
Texture
Eye Candy 5 Impact
***
1
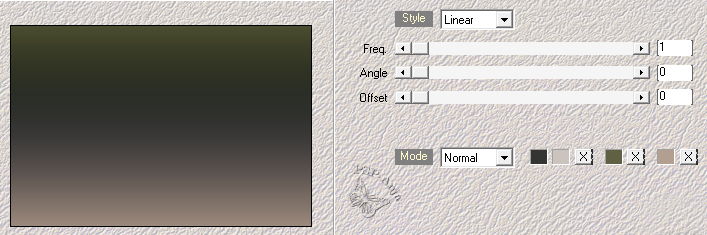
Open the image "couleurs" - we using these colors
Foregroundcolor on color 1 and Backgroundcolor on color 2
2
Open a new transparent image 900 x 600 Pixel
3
Effects - Plugins
- Medhi - Wavy Lab 1.1
4
Layers - Duplicate
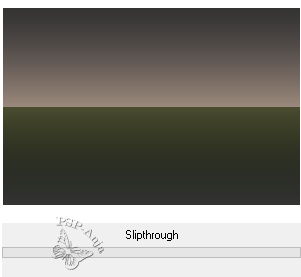
5
Effects - Plugins
- Filters Unlimited - VM Toolbox - Slipthrough
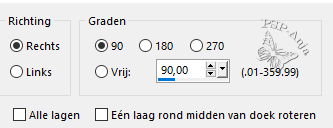
6
Image - Free rotate
7
Effects - Image Effects - Seamless Tiling
8
Effects - Edge Effects - Enhance
9
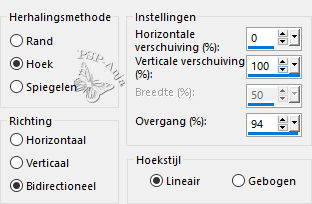
Effects - Plugins
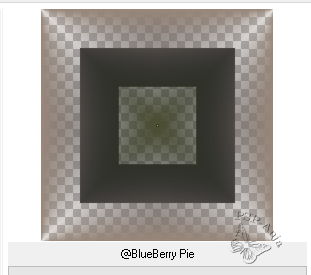
- Filters Unlimited - Bkg Kaleidopscope - @BlueBerry Pie
10
Activate Layer 1
11
Selections - Select all
12
Image - Crop to selection
13
Activate the Top Layer
14
Open the tube "LD-misted fantasy"
Edit - Copy
Activate your work
Edit - Paste a New Layer
15
Layers - New Raster Layer
16
Floodfill the Layer with white
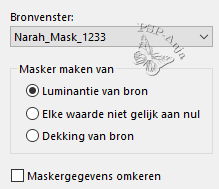
17
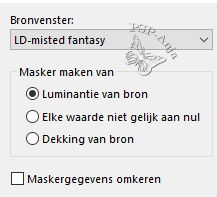
Layers - New Mask Layer - From Image
18
Layers - Merge - Merge group
(Blendmode and Opacity your choice)
19
Layers - New Raster Layer
20
Floodfill the Layer with color 3
21
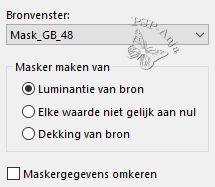
Layers - New Mask Layer - From Image
22
Layers - Merge - Merge group
23
Adjust - Sharpness - Sharpen
24
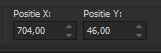
Blendmode on Dodge
25
Open the tube "déco 1"
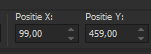
Edit - Copy
Activate your work
Edit - Paste a New Layer
26
Objects - Align - Top
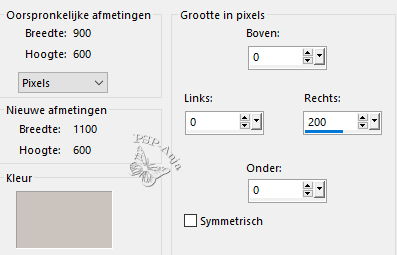
27
Layers - New Raster Layer
28
Floodfill the Layer with white
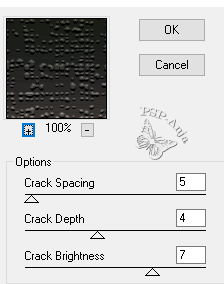
29
Layers - New Mask Layer - From Image
30
Layers - Merge - Merge group
31
Opacity on 70%
32
Activate the Bottom Layer
33
Layers - Duplicate
34
Layers - Arrange - On top
35
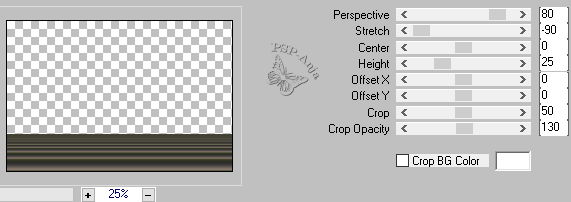
Effects - Plugins
- Mura's Meister - Perspective Tiling
36
Effects - 3D Effects - Drop Shadow
37
Effects - Plugins
- Filters Unlimited - Graphics Plus - Cross Shadow -
default
38
Opacity on 80%
39
Open the tube "déco 2"
Edit - Copy
Activate your work
Edit - Paste a New Layer
40
Blendmode on Overlay
41
Layers - New Raster Layer
42
Selectiontool (S) - Custom Selection
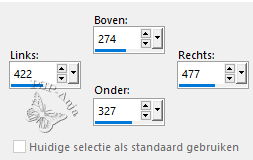
43
Floodfill the selection with color 3
44
Selection - Modify - Contract 10 Pixel
45
Floodfill the selection with color 2
46
Selection - Modify - Contract 10 Pixel
47
Floodfill the selection with color 1
48
Selections - Select none
49
Effects - Edge Effects - Enhance
50
Effects - Plugins
- Eye Candy 5 Impact - Glass - preset "Clear"
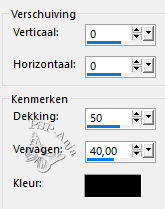
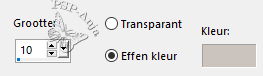
51
Pick Tool (K) - with these settings
52
Layers - Duplicate
53
Image - Mirror - Horizontal Mirror
Image - Mirror - Vertikal Mirror
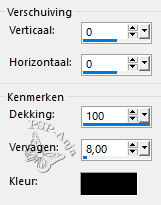
54
Pick Tool (K) - with these settings
55
Layers - Merge - Merge down
56
Adjust - Sharpness - Sharpen
57
Image - Add Border - Color 1
58
Select with your magic wand the border
59
Effects - Plugins
- Medhi - Wavy Lab 1,1 - Press OK
60
Effects - Plugins
- Texture - Craquelure
61
Selection - Modify - Contract 10 Pixel
62
Effects - Plugins
- AAA Frames - Foto Frame
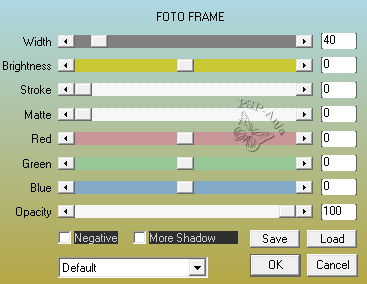
63
Selections - Select none
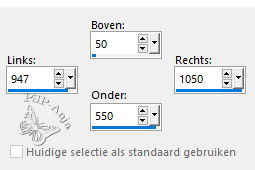
64
Selectiontool (S) - Custom Selection
65
Effects - 3D Effects - Chisel - Color 1
66
Selections - Select none
67
Open the tube "calguisalone13092017"
Edit - Copy
Activate your work
Edit - Paste a New Layer
68
Move the tube as shown on the example
69
Layers - Duplicate
70
Adjust - Blur - Gaussian Blur
30
71
Blendmode on Multiply
72
Layers - Arrange - Move down
73
Open the tube "Texte_titre"
Edit - Copy
Activate your work
Edit - Paste a New Layer
74
Move the tube as shown on the example
75
Image - Add border - 1 Pixel color 2
Image - Add border - 5 Pixel color 1
Image - Add border - 1 Pixel color 2
76
Selections - Select all
77
Image - Add border - 10 Pixel color 3
78
Selections - Inverse
79
Effects - Plugins
- Medhi - Wavy Lab 1.1 -
Press OK
80
Effects - Plugins
- Texture - Craquelure -
Press OK
81
Selections - Inverse
82
Effects - 3D Effects - Drop Shadow
83
Selections - Select none
84
Image Add border - 1 Pixel color 2
85
Image - Resize - 950 Pixel large
86
Place your name or watermark
87
Save as JPG